How to Build a Custom "Restock Request" Module for Magento 2
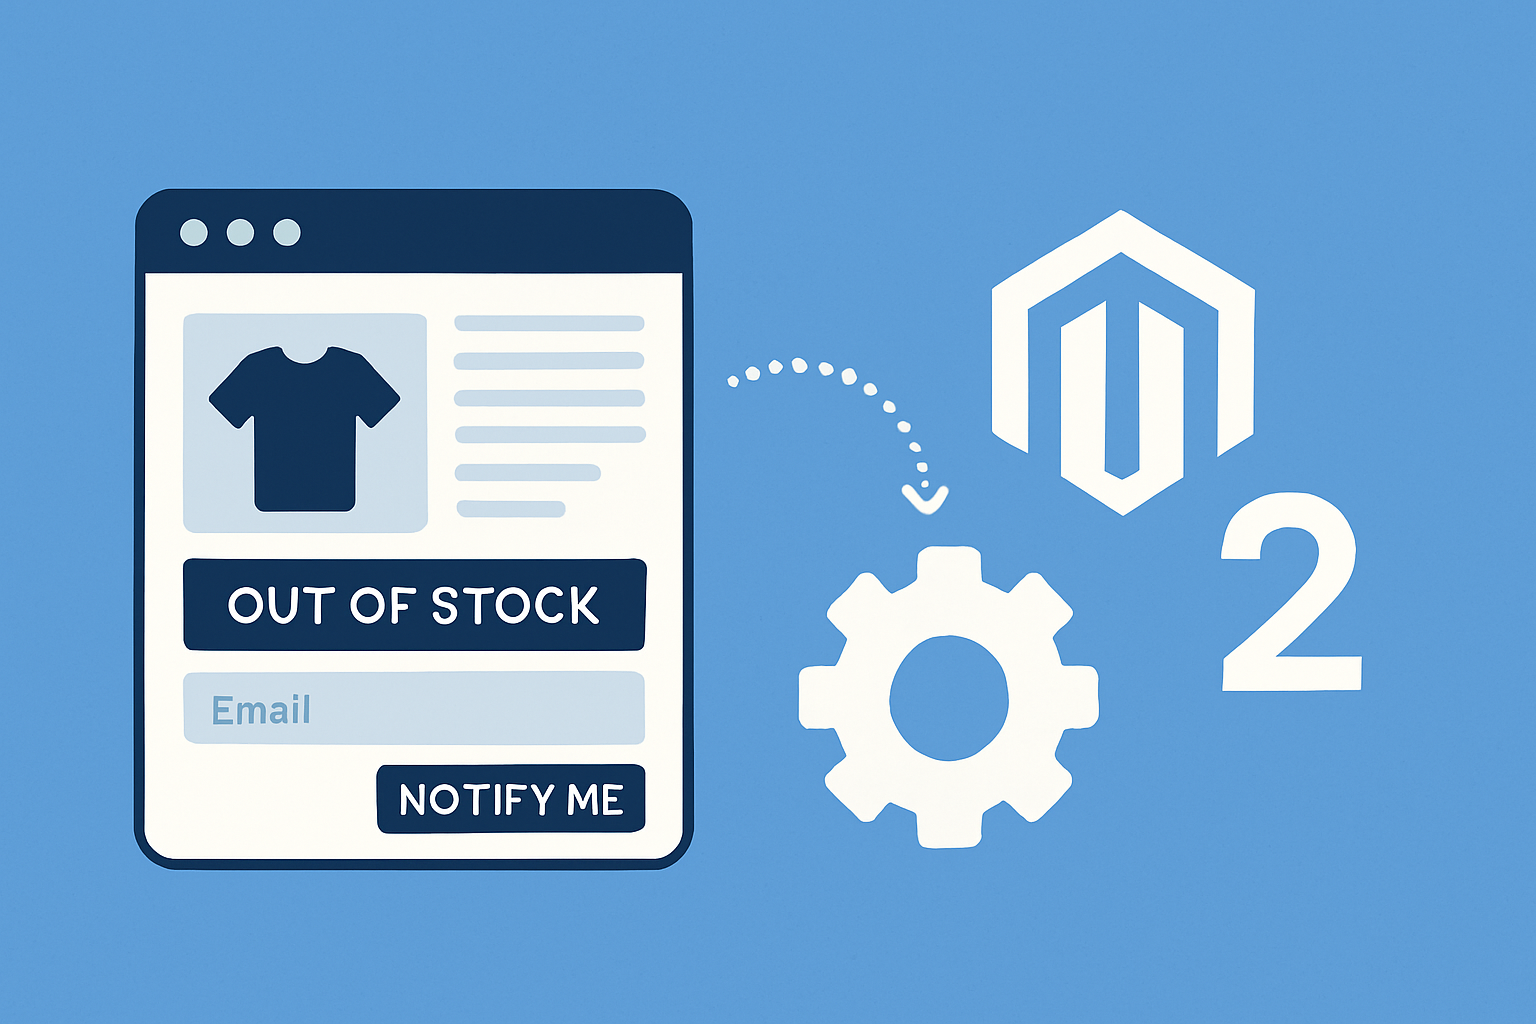
Want to add a "Restock Request" feature to your Magento 2 store so customers can sign up for notifications when an out-of-stock product returns? In this post I’ll walk you through building a custom Magento 2 module that: captures customer interest, watches stock changes using the Observer pattern, sends automatic emails when items are back in stock, exposes an admin UI to manage requests and thresholds, improves SEO for out-of-stock products, and helps you measure ROI from these notifications. I’ll be practical and show step-by-step code examples, file structure, and suggestions for tracking conversions — like I’m showing a colleague how I’d ship this in a real project.
Why build a custom restock request module?
Several extensions exist but making your own has advantages: you control behavior, integrate with your exact notification workflow, and keep your site lightweight. Also, you can tailor the admin UX to your merchandising and reporting needs. The core goals are simple:
- Let customers sign up for notifications when an item is out of stock.
- Monitor stock changes (observer pattern) and trigger an email when qty moves above a threshold.
- Provide a concise admin interface to view and manage requests and set thresholds.
- Optimize SEO and structured data for product pages that are out of stock.
- Allow ROI tracking: identify orders that originated from restock notifications.
High-level architecture
We’ll keep the architecture modular and aligned with Magento 2 best practices. At a glance:
- Module: Magefine_RestockRequest
- DB: declarative schema (db_schema.xml) for a restock_request table
- Frontend: small form on product pages to submit email + product ID
- Observer: listens to stock item save events and triggers notifications
- Emails: templates with TransportBuilder
- Admin: system configuration and an admin grid UI component
- Tracking: UTM parameters in emails and optional order link between restock request and order
File structure
Here’s a minimal file structure to start with.
app/code/Magefine/RestockRequest/
├── etc
│   ├── module.xml
│   ├── db_schema.xml
│   ├── frontend
│   │   └── routes.xml
│   ├── adminhtml
│   │   └── routes.xml
│   ├── events.xml
│   ├── email_templates.xml
│   └── config.xml (or system.xml for admin settings)
├── registration.php
├── composer.json
├── Controller
│   └── Index
│       └── Submit.php
├── Model
│   ├── Request.php
│   ├── ResourceModel
│   │   └── Request.php
│   │   └── Request/Collection.php
├── Observer
│   └── StockChangeObserver.php
├── view
│   └── frontend
│       └── templates
│           └── restock_form.phtml
│   └── adminhtml
│       └── layout
│           └── ... (grid ui components)
└── etc
    └── email_templates.xml
Step 1 — basic module registration
Create registration.php and module.xml.
<?php
use Magento\Framework\Component\ComponentRegistrar;
ComponentRegistrar::register(
    ComponentRegistrar::MODULE,
    'Magefine_RestockRequest',
    __DIR__
);
<?xml version="1.0"?>
<config xmlns:xsi="http://www.w3.org/2001/XMLSchema-instance" xsi:noNamespaceSchemaLocation="urn:magento:framework:Module/etc/module.xsd">
    <module name="Magefine_RestockRequest" setup_version="1.0.0"/>
</config>
Step 2 — database schema (declarative)
Create db_schema.xml to store requests. We’ll use a simple table to track email, product_id, website_id, notified flag, created_at and token for tracking.
<?xml version="1.0"?>
<schema xmlns:xsi="http://www.w3.org/2001/XMLSchema-instance" xsi:noNamespaceSchemaLocation="urn:magento:framework:Setup/Declaration/Schema/etc/schema.xsd">
    <table name="magefine_restock_request" resource="default" engine="innodb" comment="Restock Requests">
        <column xsi:type="int" name="request_id" padding="10" unsigned="true" nullable="false" identity="true" comment="Request ID" />
        <column xsi:type="int" name="product_id" nullable="false" unsigned="true" comment="Product ID" />
        <column xsi:type="varchar" name="email" nullable="false" length="255" comment="Customer email" />
        <column xsi:type="int" name="website_id" nullable="false" unsigned="true" default="0" comment="Website ID" />
        <column xsi:type="smallint" name="notified" nullable="false" default="0" comment="Has been notified" />
        <column xsi:type="timestamp" name="created_at" nullable="false" default="CURRENT_TIMESTAMP" on_update="false" comment="Created At" />
        <column xsi:type="varchar" name="token" nullable="false" length="64" comment="Tracking token" />
        <constraint xsi:type="primary" referenceId="PRIMARY">
            <column name="request_id"/>
        </constraint>
        <index referenceId="MAGEFINE_RESTOCK_REQUEST_PRODUCT_ID" indexType="btree" >
            <column name="product_id"/>
        </index>
        <index referenceId="MAGEFINE_RESTOCK_REQUEST_EMAIL" indexType="btree" >
            <column name="email"/>
        </index>
    </table>
</schema>
Run bin/magento setup:upgrade after adding the file to create the table.
Step 3 — frontend form to collect interest
Add a small form on product pages that posts to a controller. Keep it minimal to reduce friction: email + hidden product_id.
<!-- view/frontend/templates/restock_form.phtml -->
<?php /** @var $block \Magento\Framework\View\Element\Template */ ?>
<?php $url = $block->getUrl('restockrequest/index/submit'); ?>
<form id="restock-request-form" action="<?= $url ?>" method="post" data-role="restock-request">
    <input type="hidden" name="product_id" value="<?= $block->escapeHtml($_product->getId()) ?>" />
    <input type="email" name="email" placeholder="Enter your email to be notified" required/ >
    <button type="submit" class="action primary">Notify me</button>
</form>
To render the block in catalog_product_view.xml layout, declare a block.
<block class="Magento\Framework\View\Element\Template" name="magefine.restock.form" template="Magefine_RestockRequest::restock_form.phtml" after="product.info.addtocart"/>
Submit controller
Handle the form in Controller/Index/Submit.php. Validate email and save the request. Add a generated token for tracking and to link back to orders later.
<?php
namespace Magefine\RestockRequest\Controller\Index;

use Magento\Framework\App\Action\Action;
use Magento\Framework\App\Action\Context;
use Magefine\RestockRequest\Model\RequestFactory;
use Magento\Customer\Model\Session as CustomerSession;
use Magento\Store\Model\StoreManagerInterface;

class Submit extends Action
{
    protected $requestFactory;
    protected $customerSession;
    protected $storeManager;

    public function __construct(
        Context $context,
        RequestFactory $requestFactory,
        CustomerSession $customerSession,
        StoreManagerInterface $storeManager
    ) {
        parent::__construct($context);
        $this->requestFactory = $requestFactory;
        $this->customerSession = $customerSession;
        $this->storeManager = $storeManager;
    }

    public function execute()
    {
        $post = $this->getRequest()->getPostValue();
        if (!isset($post['email']) || !filter_var($post['email'], FILTER_VALIDATE_EMAIL)) {
            $this->messageManager->addErrorMessage(__('Please enter a valid email.'));
            return $this->_redirect($this->_redirect->getRefererUrl());
        }

        $productId = (int)($post['product_id'] ?? 0);
        if (!$productId) {
            $this->messageManager->addErrorMessage(__('Invalid product.'));
            return $this->_redirect($this->_redirect->getRefererUrl());
        }

        $model = $this->requestFactory->create();
        $model->setData([
            'product_id' => $productId,
            'email' => $post['email'],
            'website_id' => $this->storeManager->getStore()->getWebsiteId(),
            'notified' => 0,
            'token' => bin2hex(random_bytes(16))
        ]);
        try {
            $model->save();
            $this->messageManager->addSuccessMessage(__('You will be notified when the product is back in stock.'));
        } catch (\Exception $e) {
            $this->messageManager->addErrorMessage(__('Could not save your request.'));
        }

        return $this->_redirect($this->_redirect->getRefererUrl());
    }
}
Model and ResourceModel
Keep models simple: extend Magento\Framework\Model\AbstractModel and configure resource model.
<?php
namespace Magefine\RestockRequest\Model;

use Magento\Framework\Model\AbstractModel;

class Request extends AbstractModel
{
    protected function _construct()
    {
        $this->_init('Magefine\RestockRequest\Model\ResourceModel\Request');
    }
}

// ResourceModel
namespace Magefine\RestockRequest\Model\ResourceModel;

use Magento\Framework\Model\ResourceModel\Db\AbstractDb;

class Request extends AbstractDb
{
    protected function _construct()
    {
        $this->_init('magefine_restock_request', 'request_id');
    }
}
Step 4 — Observer: watch stock changes
We’ll use the Observer pattern: listen to stock item save events and check whether the product moved from out-of-stock to in-stock (or crossed a configurable threshold). Good events to use are cataloginventory_stock_item_save_after or cataloginventory_stock_item_qty_changes. cataloginventory_stock_item_save_after is generic and widely compatible.
Create etc/events.xml in the frontend or global area so it runs when stock changes from anywhere (admin or API):
<?xml version="1.0"?>
<config xmlns:xsi="http://www.w3.org/2001/XMLSchema-instance" xsi:noNamespaceSchemaLocation="urn:magento:framework/Event/etc/events.xsd">
    <event name="cataloginventory_stock_item_save_after">
        <observer name="magefine_restock_stock_change" instance="Magefine\RestockRequest\Observer\StockChangeObserver" />
    </event>
</config>
Now the observer itself. It needs to compare the previous quantity with the new one and ensure we only notify when the product becomes available (i.e., crosses the defined threshold). To get the previous qty, use the stock item resource original data or load original record before save. For simplicity we’ll check the oldData if available, else guard against multiple notifications by checking that notified=0.
<?php
namespace Magefine\RestockRequest\Observer;

use Magento\Framework\Event\ObserverInterface;
use Magento\Framework\Event\Observer;
use Magefine\RestockRequest\Model\ResourceModel\Request\CollectionFactory as RequestCollectionFactory;
use Magento\Framework\App\Config\ScopeConfigInterface;
use Magento\Store\Model\ScopeInterface;
use Magento\Framework\Mail\Template\TransportBuilder;
use Magento\Store\Model\
StoreManagerInterface;

class StockChangeObserver implements ObserverInterface
{
    protected $requestCollectionFactory;
    protected $scopeConfig;
    protected $transportBuilder;
    protected $storeManager;

    public function __construct(
        RequestCollectionFactory $requestCollectionFactory,
        ScopeConfigInterface $scopeConfig,
        TransportBuilder $transportBuilder,
        StoreManagerInterface $storeManager
    ) {
        $this->requestCollectionFactory = $requestCollectionFactory;
        $this->scopeConfig = $scopeConfig;
        $this->transportBuilder = $transportBuilder;
        $this->storeManager = $storeManager;
    }

    public function execute(Observer $observer)
    {
        /** @var \Magento\CatalogInventory\Model\Stock\Item $stockItem */
        $stockItem = $observer->getEvent()->getItem();
        if (!$stockItem) {
            return;
        }

        $productId = $stockItem->getProductId();
        $qty = (float)$stockItem->getQty();

        // Configurable threshold from system config
        $threshold = (float)$this->scopeConfig->getValue('restockrequest/settings/threshold', ScopeInterface::SCOPE_STORE, $this->storeManager->getStore()->getId());
        if ($threshold <= 0) $threshold = 0; // default 0

        // Check if quantity is now above threshold
        if ($qty > $threshold) {
            // Find pending requests for this product
            $collection = $this->requestCollectionFactory->create();
            $collection->addFieldToFilter('product_id', $productId);
            $collection->addFieldToFilter('notified', 0);

            foreach ($collection as $request) {
                try {
                    // send email
                    $this->sendNotificationEmail($request);
                    // mark notified
                    $request->setData('notified', 1);
                    $request->save();
                } catch (\Exception $e) {
                    // log error, continue to next
                }
            }
        }
    }

    protected function sendNotificationEmail($request)
    {
        $storeId = $request->getData('website_id');
        $templateId = 'magefine_restock_request_template'; // defined in email_templates.xml
        $templateVars = [
            'email' => $request->getData('email'),
            'product_id' => $request->getData('product_id'),
            'token' => $request->getData('token'),
            'product_url' => $this->storeManager->getStore($storeId)->getBaseUrl() . 'catalog/product/view/id/' . $request->getData('product_id') . '?utm_source=restock_email&utm_medium=email&utm_campaign=restock'
        ];

        $from = ['email' => $this->scopeConfig->getValue('trans_email/ident_general/email'), 'name' => $this->scopeConfig->getValue('trans_email/ident_general/name')];

        $transport = $this->transportBuilder
            ->setTemplateIdentifier($templateId)
            ->setTemplateOptions([
                'area' => \Magento\Framework\App\Area::AREA_FRONTEND,
                'store' => $storeId
            ])
            ->setTemplateVars($templateVars)
            ->setFrom($from)
            ->addTo($request->getData('email'))
            ->getTransport();

        $transport->sendMessage();
    }
}
Notes: the example builds a product URL with UTM params for tracking. You might prefer to build the URL with the product’s URL key using the product repository — that’s cleaner for SEO and GA tracking.
Step 5 — add admin configuration
Make the threshold configurable from Stores > Configuration. Add etc/adminhtml/system.xml with a section restockrequest and a field threshold. Here’s a minimal snippet:
<config xmlns:xsi="http://www.w3.org/2001/XMLSchema-instance" xsi:noNamespaceSchemaLocation="urn:magento:module:Magento_Config:etc/system_file.xsd">
  <system>
    <section id="restockrequest" translate="label" sortOrder="800" showInDefault="1" showInWebsite="1" showInStore="1">
      <label>Restock Request</label>
      <group id="settings" translate="label" type="text" sortOrder="10" showInDefault="1" showInWebsite="1" showInStore="1">
        <label>Settings</label>
        <field id="threshold" translate="label" type="text" sortOrder="10" showInDefault="1" showInWebsite="1" showInStore="1">
          <label>Stock threshold for notifications</label>
          <comment>Send notifications when product qty > threshold</comment>
        </field>
      </group>
    </section>
  </system>
</config>
Admin grid for managing requests
For an admin grid you can create a UI component grid under view/adminhtml/ui_component and a corresponding layout page and menu item. The grid will show email, product (link), status (notified), created_at and actions (mark as notified, delete). Implementing a full UI grid is boilerplate-heavy; the essential parts are:
- ui_component XML defining columns
- data provider that uses your ResourceModel collection
- adminhtml ACL and menu entries
I won’t paste the entire grid XML here (it’s lengthy), but you can use Magento’s UI component grid generator or copy patterns from sample modules — the important bit is exposing filter and mass actions so merchandisers can easily manage thousands of requests.
Integration with Magento notification system (email templates)
Define an email template identifier and a default template in etc/email_templates.xml. Use template variables to populate a link with UTM tags and a tracking token so you can attribute conversions.
<email_templates xmlns:xsi="http://www.w3.org/2001/XMLSchema-instance" xsi:noNamespaceSchemaLocation="urn:magento:module:Magento_Email:etc/email_templates.xsd">
    <template id="magefine_restock_request_template" label="Restock notification (Magefine)" file="magefine_restock_notification.html" type="html" module="Magefine_RestockRequest"/>
</email_templates>
Add a template file in view/frontend/email/magefine_restock_notification.html:
<html>
<body>
<p>Hi,</p>
<p>The product you asked about is back in stock: <a href="{{var product_url}}">Click here to view</a>.</p>
<p>If you’d like to be sure this offer is saved for you, click the link and add it to cart.</p>
<p>Thanks,<br/>Your Store Team</p>
</body>
</html>
Optimization for SEO and rich snippets
This is an important and often overlooked part. When a product is out of stock, search engines and shoppers need clear signals. Two tactics:
- Add meta tags and structured data that reflect availability.
- Expose the restock signup (form) so customers and search engines know there is demand — but avoid creating duplicate pages.
Output JSON-LD on the product page to expose Product schema with updated availability. Add a block to product view that emits JSON-LD, like:
<script type="application/ld+json">
{
  "@context": "http://schema.org/",
  "@type": "Product",
  "name": "<?= $block->escapeHtml($_product->getName()) ?>",
  "sku": "<?= $block->escapeHtml($_product->getSku()) ?>",
  "offers": {
    "@type": "Offer",
    "price": "<?= $_product->getPrice() ?>",
    "priceCurrency": "<?= $block->escapeHtml($block->getStore()->getCurrentCurrencyCode()) ?>",
    "availability": "<?= $_product->isSaleable() ? 'http://schema.org/InStock' : 'http://schema.org/OutOfStock' ?>"
  }
}
</script>
When the product is out of stock, ensure the page still has its product schema but with availability: OutOfStock. You can also add a visible note and the restock form. This helps search engines know the product still exists and might reappear.
Meta description: include meaningful copy like "Product X is currently out of stock. Sign up to get notified when restocked." That helps clicks and reduces bounce from shoppers who want to be notified rather than leave the product page immediately.
Step 6 — tracking conversions and measuring ROI
Measuring the impact of restock emails is crucial. You want to know how many orders were generated by notifications and their value. I recommend two complementary approaches:
1) Use UTM parameters and Google Analytics
Add UTM parameters to the product URL in the email (we already used utm_source=restock_email & utm_campaign=restock). In Google Analytics / Google Analytics 4 you can create a segment for sessions with those UTM parameters and measure conversions and revenue. That gives you cross-channel analytics and cohort behaviors.
2) Add a direct link between request and order in Magento
For precise attribution in Magento, store the restock request token (or request_id) in the customer’s session when they click from the email, carry it through the checkout, and save it on the order. Later you can query orders with that token to calculate conversion rate and revenue. The basic flow:
- Email link = product_url + &restock_token=ABCD123
- When user lands on the product page, JS picks up the token and sets a cookie, e.g., restock_token=ABCD123
- On cart/checkout, a small observer copies the cookie value into the quote (custom quote attribute) and then to the order.
- In admin or a custom report, query orders with that custom order attribute to compute conversions and revenue.
Example: a small JS in your product template sets cookie:
<script>
(function(){
  var urlParams = new URLSearchParams(window.location.search);
  var token = urlParams.get('restock_token');
  if (token) {
    document.cookie = 'restock_token=' + token + ';path=/;max-age=' + (60*60*24*30);
  }
})();
</script>
And an observer to inject the token into quote and order (simplified):
<?php
namespace Magefine\RestockRequest\Observer;

use Magento\Framework\Event\ObserverInterface;
use Magento\Framework\Event\Observer;

class SaveRestockTokenToQuote implements ObserverInterface
{
    protected $cookieManager;
    protected $cookieMetadataFactory;

    public function __construct(
        \Magento\Framework\Stdlib\CookieManagerInterface $cookieManager,
        \Magento\Framework\Stdlib\Cookie\
CookieMetadataFactory $cookieMetadataFactory
    ) {
        $this->cookieManager = $cookieManager;
        $this->cookieMetadataFactory = $cookieMetadataFactory;
    }

    public function execute(Observer $observer)
    {
        $quote = $observer->getEvent()->getQuote();
        try {
            $token = $this->cookieManager->getCookie('restock_token');
            if ($token) {
                $quote->setData('restock_token', $token);
            }
        } catch (\Exception $e) {}
    }
}
Later, map the quote field to order by using a plugin or observer on sales_convert_quote_to_order to copy the data. Then you can do direct SQL queries to find orders where restock_token is present and compute total value, average order value, conversion rate (requests > orders) and LTV if needed.
Security and spam protection
Because the form accepts emails, add basic anti-spam measures:
- Rate-limit submissions per IP (use cache or DB timestamp)
- Validate email thoroughly and prevent duplicate requests for same email/product
- Use a honeypot field or Google reCAPTCHA if spam risks are high
Deduplicate by adding a unique composite index email+product_id or check before saving. For example, in your Submit controller check existing collection for same email and product_id and return a success message telling them they’re already on the list.
Performance considerations
When a large catalog has frequent stock updates (e.g., via ERP sync), you must avoid sending thousands of emails synchronously and duplicating work on each save. Best practices:
- Queue email sending via Magento message queue (AMQP) or create a cron job that processes pending requests in batches — instead of sending inside the observer synchronously.
- Add a small cooldown window: only process a product once every N minutes to avoid multiple emails during a rapid update window.
- Paginate notifications and rely on asynchronous transport (message queue or cron).
Example: Instead of calling sendNotificationEmail directly in the observer, mark requests as 'ready_to_send' and have a cron that processes them in batches and sends emails with retry logic.
UX notes
Make the form frictionless:
- Place it near the Add to Cart button or product price.
- Use a single field email input and friendly microcopy explaining delivery expectation (e.g., "We’ll send a short email when it's back — no spam").
- Confirm immediately with an on-page message and optionally allow customers to manage their subscriptions via a link in the email (using the token as authentication).
Example: marking notified requests and exporting
Create a mass-action in your admin grid to mark selected requests as notified, or a button to export the list to CSV. Exported lists are useful to sync with external email tools or to cross-check conversions.
Example: advanced features to consider later
- Send segmented emails with product recommendations for customers who didn’t convert after restock.
- Integrate with marketing automation (Klaviyo, Mailchimp) by syncing requests via API.
- Allow customers to select "notify when X units available" (instead of any availability) for B2B scenarios.
- Support multiple channels (SMS, mobile push) for higher conversion rates.
Testing and rollout
- Unit test your observer logic for the qty threshold case.
- QA with manual stock changes in admin to confirm behavior.
- Test email deliverability and check UTM tracking in GA realtime.
- Start with a small batch (enable cron sending for a subset of SKUs) and monitor unsubscribes and conversions.
Troubleshooting checklist
- No emails sent: check cron/queue configuration and mail transport logs.
- Duplicate emails: ensure deduplication and cooldown windows.
- Wrong product URL in email: use product repository to get URL key rather than simple id-based link.
- Large spike in stock update events: move send logic to cron or message queue.
Measuring impact — metrics to track
To quantify ROI, track:
- Number of restock signups per SKU and category
- Emails sent and open rate (via email platform)
- Click-through rate from restock emails
- Conversion rate (click > order) and revenue attributed (UTM/DB token)
- Average order value for restock-driven orders vs baseline
Store-level KPI example: If 1,000 signups generated 150 orders with total revenue $12,000, the conversion rate is 15% and you get an average order value of $80. Compare that to cost (email sending, development) and the lift in repeat purchases to calculate ROI.
Wrap-up and next steps
That’s a solid starting point for a custom Restock Request module on Magento 2. Key takeaways:
- Use the Observer pattern to watch stock changes and trigger notifications.
- Save requests in a dedicated table and provide an admin grid for merchandisers.
- Use Magento’s TransportBuilder for email templates and add UTM params for analytics.
- Expose proper JSON-LD and meta tags so product pages remain valuable and indexable even when out of stock.
- Implement tracking from email click to order to measure ROI precisely.
If you want, I can prepare a starter code repository with the scaffolded module and a working observer that uses cron batching for emails. Tell me whether your store uses Magento Open Source or Adobe Commerce and if you want async message queues (RabbitMQ) for scalable sending — I’ll adapt the example to your stack and include an admin grid template and GA4 event snippet for click tracking.
Need the module packaged for Magefine’s standard deployment workflow (composer-ready, with proper ACLs and UI grid)? I can provide a zip or a Git repo ready to install on dev. Let me know what you prefer and I’ll produce the code skeleton that you can drop into app/code or install via composer.